
Step 1: Scaling of pallet rack
- Open a new file in SketchUp.
- Import a pallet rack from https://3dwarehouse.sketchup.com/?hl=en
- Select Dimension icon.
- Measure length of bay.
- For the purpose of the exercise, we are required to change the length of the bay to 2.7 m.
- One of the quickest way is to scale the size of the rack.
- Calculate the value of 2.7 divided by the current length of bay.
- Take this to be x.

- Click on Tools and select "Scale".
- Click on the middle green square on the left of the rack.
- On the keyboard, key in x. This will be reflected at the bottom of the screen.
- Click on the Select icon.
- Click on the empty space beside the pallet rack.
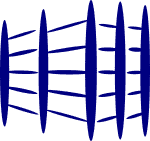
The pallet rack is modified to our requirement.


Step 2: Adding pallet boxes to the rack
- Select Tape Measure icon
- Do a marking 100 mm away from the left front leg of the rack

- Import the pallet with box which we have created in Tutorial 1.
- Select the Rotate icon.
- Rotate the pallet 90 degree.

- Select the Move icon.
- Click on the left bottom corner of the pallet.
- Move to the mark and do a left mouse click.
- Click Move icon.
- Press "Ctrl". The cursor will have an additional plus sign.
- Click on the pallet box and scroll to the right.
- Type in 1,300 mm.
- First layer is completed.

- Measure the distance from the base of rack upright stand to the top of the 1st horizontal beam. Take this as y cm.
- Presss "Ctrl" and at the same time, click on the 2 pallets created previously.
- The 2 pallets are highlighted.
- Click on the Move icon.
- Press "Ctrl". Notice the cursor has an additional plus sign.
- Click on the pallet and move the mouse upward.
- Type in y cm.
- Then, type in 5x. This will create 5 copies upward.


- Go to Edit. Delete Guides.
- Highlight the rack and all the pallets.
- Right click mouse and select "Make Group".
- Save as "My first pallet"